Wednesday, January 30, 2008

More Painting Pointers


I realized after a few read throughs, that Atredies article was not about lazy painting, but about working smarter not harder. When one has nine pointers on how to turn out painted forces they aren’t lazy; they’re economical. The thought occurred to me that many of his pointers were the base for which advanced painting techniques come from, so I thought I would share some tips on improving your painting ability.

1. Paint often

If you paint 5 minutes or 5 hours, you must paint everyday. This simple act will improve your skills, even if you are not trying to. Painting on a daily basis will build muscle memory and fine motor skills. I find that when I go without painting it takes me some time to get back into it, so save your self the hassle.

2. Ask

I find that I have learned more from asking others more experienced than me how they accomplish various effects. Painters love telling you how they accomplished a project, so take advantage of this willingness to share.

3. Research

You should always look for new techniques. Thanks to the internet this is a fairly easy task. For example, Micron Pens have made some of my painting tasks easier, and in fact I have become faster painter because of these miraculous pens.

4. Tools

If you are really into painting figures invest in your tools. I used to think that brushes or paints were the same as any other. I must say I was truly mistaken. Cheap hobby paints are substandard when compared to figure paints and artist paints, and brushes are not all created equal. Since I’ve upgraded my brushes and stopped using cheapo paints my work has improved. Please understand by no means are your tools magic “PF Flyers” but they will assist you in the quest for improvement.

5. Cheat

Painting is all about the art of illusion. If you find a shortcut, a rule to break, or technique that gives you a better illusion then do it. By no means are any set of pointers or advice meant to be hard fast rules. This is your hobby, so in the end it is up to you to define how to best approach it.

Thursday, January 24, 2008

Apocalypse Formations!

BoLS has links up to the new Orky Apoc formations at GW, which some of you have been seeing for the past month or so. There are some comments/complaints there to the effect that these formations are not balanced, and I must agree with one caveat (reposting from my comment there):

Apocalypse is definitely not about balance, but about getting together with friends and figuring out how to put together a xbawx-huege game. And since we're encouraged to come up with formations of our own, there's nothing to keep us from making up similar things for non-Green armies.

Here's an example:

=============================================
The Conflagration of Faith (Witch Hunters) 200+models
1 Command Immolator
2+ Immolator Squadrons
0+ Hellhound Squadrons

One Immolator must be designated as Command vehicle, with appropriately grand Sisters of Battle iconography. Other tanks in the formation must be deployed within 12" of the Command Immolator, or if entering from Strategic Reserve, enter from within 12" of the Command Immolator's entry point.

Crackling Faith: Any Immolator or Hellhound in this formation that CAN perform a Tank Shock MUST perform that Tank Shock. Units Shocked by any tank within this formation suffer a cumulative -1 penalty to leadership for every Immolator or Hellhound within 12" after Tank Shock Movement is completed.

Searing Promethium: If the Command Immolator is still on the table, any tank in this formation may also fire its main weapon after Tank Shocking. Units forced to test for fallback by taking casualties suffer a cumulative -1 penalty for every Immlator or Hellhound within 12" when they test.

================================================
Now you try it!

Monday, January 21, 2008

Finished Comission: PH Dark Angel Comander

Well ladies and gents I have completed a comissioned piece that is now all made of awesome and win. So without further ado, or guilding the lily:

Crosposted at Tactical Rock.

Sunday, January 20, 2008

Swarms of Swarmy-ness!

Well, last night Gordon and played a new concept of 'Nids. I played the ultimate Nid swarms:

Five Warriors as HQ
10 Genestealers
2 Zoes (as synapse)
4 Ripper Swarms
64 Gaunts
64 homogaunts

I fought Gordon's Tau. It was a Recon mission, not the best for me, but oh well.

It didn't go well for me. I lost first turn which is what all Nid players want! I didn't quite get into H2H until the second round, but with units of 32 models each it didn't matter if I got shot up. I was anchored by the synapse creatures and wasn't going anywhere.

I took Zoes as they have the best saves, a good blast trick, and one of the only invulnerable saves in the Nid list. If I took Tyrants, I find that people go out of their way to shoot them first. Sometimes they leave the Zoes alone till they learn about their abilities.

If you up the strength of the gaunts, then they can swarm around to the back of any tank or skimmer and shoot the hell out it! And if that fails, they can then crawl up the tailpipe and try to blow it up. All they need is some lucky rolls, and with 32 shots one would think that at least a couple would come up 6!

What killed the most troops was the pie plates that only the Tau can give. Between the Zoes and gaunts I did manage to take out most of his skimmer's weapons. By turn six he only had one pie plate left. Heh!

In the end, I lost. We played Alpha and he had his Piranhas in my back field, but most of his troops were locked in H2H with my gaunts, with my homogaunts dying off first but locking the Kroot in place. The genestealers of course got shot up quickly and never made it into H2H, well except with drones and who counts them? But they absorb firepower that would have gone to my warriors. All that I had at the end of turn six was one warrior with four gaunts, one zoe with about six gaunts taking on the Tau's HQ. So I had nothing in his deployment zone.

This experiment I think went well even though I knew I lost after the second turn. But we played till the end and since he only had two scoring units in my deployment zone that might have been destroyed with better rolling, I thought I had done pretty good.

Sunday, January 13, 2008

Lazy Painting 101

I am a lazy painter.

There. I said it! I'm not someone who will ever win a Golden Demon. I will never spend days working on one miniature, making sure it's perfect. I will never discuss the merits of one company's paints over another company's paints. I am not the guy that a lot of painting articles are for. I'm not willing or able to put that much time or effort into expertise.

However, I do have a large painted Space Marine army that looks good on a field and that people like to play against. Expert painters will tell me that my miniatures need more work but most people will say that my army is really well painted. Tragically, I find that I often have a much better looking army than a lot of people I have played because more than a few people don't want to paint. Some people don't think their paint jobs will look good compared to other people's work. Some have a lot of minis and are daunted by the idea of painting them all. Some people just don't feel they have any painting skills. These are all people I used to be when I first started.

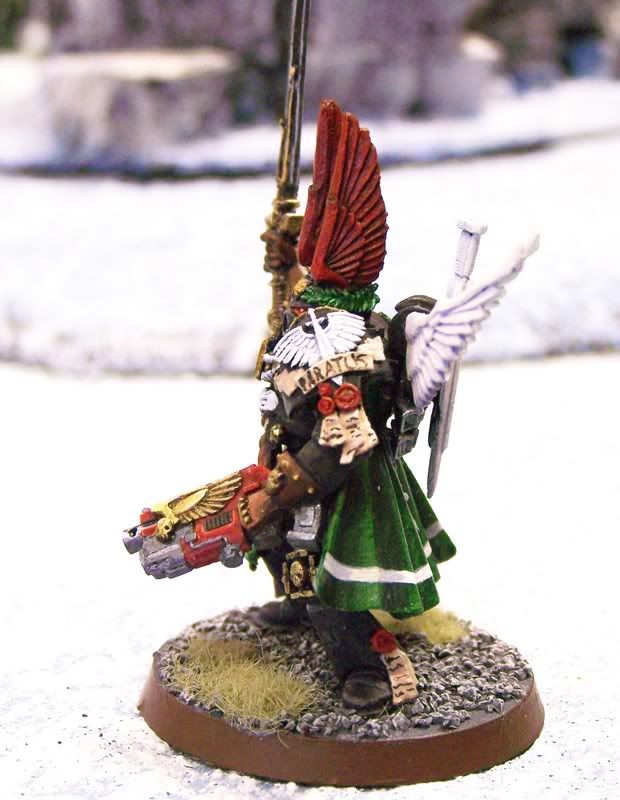
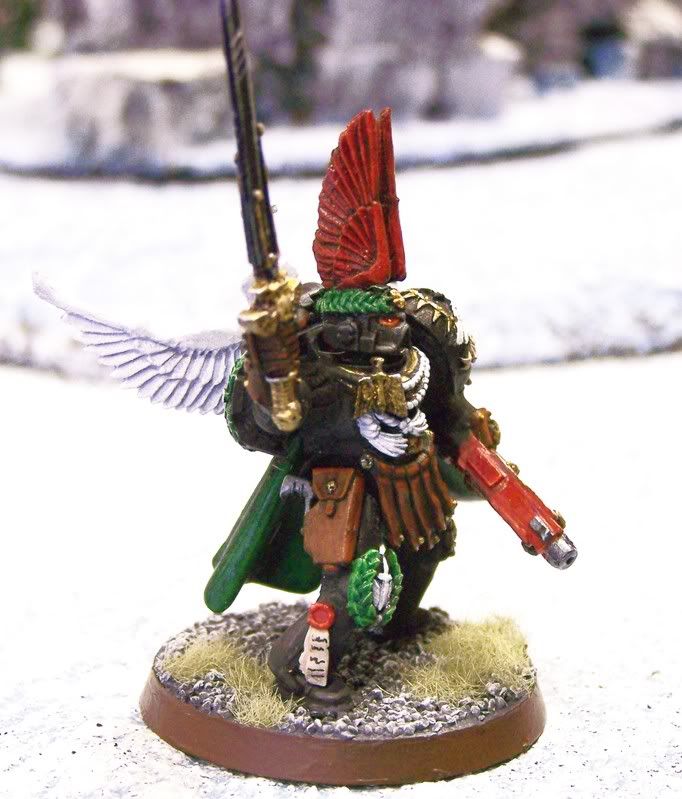
So, how do you get from this…


…to this?


If you're looking for the tips of the pros, this article won't help you at all. If you want a decent looking army that you're proud to field and that opponents are happy to play, then you might want to read this. I'm going to tell you how I, a lazy painter, do it and maybe it'll help you to get your bare plastic out of the boxes and onto the field faster and prettier. Most importantly, it will hopefully get you playing and give you the desire to be a better painter.


1. Be uniform.

The biggest secret to having a good looking army is making a uniform army. If you have a hodge-podge of miniatures that are all different, they'll look like, well, a hodge-podge of miniatures. If you have a sea of guys in your colors and scheme, it'll look great on a table and people will remember it. Besides, when you're playing, you don't see the minis individually from 6 inches away, you see them in units from arm's length so if they look like they belong together, they'll look good as a whole.

2. Be consistent.

This is a little different than the uniformity point. If you do something a certain way, stick with it. If you paint certain types of weapons a certain style, do it through the entire army. When I have a mini wearing cloth (capes, robes aprons, etc.), I always "paint" the cloth with ink. If you're consistent with how you do the details, it'll make them look that much better and add to that aforementioned uniformity.

3. Basecoat your miniatures in black.

A lot of people will tell you that you should use white so colors will stand out. I read in some GW painting guide that you should use gray. I always use black for several reasons. Firstly, black spray paint is cheap and easy to come by. Second, as you paint, there will be recessed spaces and if they're already dark, it'll save you time and effort. Lastly, if you have black spots on your miniature, they're already black! If you want to use bright colors, then either paint the small area white or, if you’re using something bright all over, heavily drybrush the mini white and you'll still get the color and the recesses will be shadowed.

Personally, I recommend either Krylon or Rustoleum flat black depending on how you plan your painting. If you plan ahead what and when you're going to paint, use Rustoleum. It takes a day to fully dry but you can't overspray without trying and it keeps all your detail. If the mood hits you and you want to paint now, use Krylon. It'll go on alright and it'll be dry and ready in an hour. I usually use Rustoleum because I’ll often basecoat something and forget about it for a few days out on the patio…

4. Learn how to drybrush.

Dry brushing is your best friend. It makes metals look good, it highlights, when done right, it can even give the illusion of lighting. It's wonderful. But there's a little bit of a secret. Your brush HAS TO BE DRY. If you have too much paint, it'll streak on. If you have a damp brush, it'll come out weird. I use newspapers as my paint bed because they're easily replaceable and cheap to acquire (in fact, the big Austin weekly is perfect). When you intend to drybrush, get the smallest little bit of paint on your brush and then wipe your brush off on the paper. Keep doing it until no more paint comes off the brush. THEN do your drybrushing. Just run along the places you want and keep doing it. You'll see how the color starts to appear. Do it until you get the look you want. And remember that drybrushing will eventually mess up whatever brush your using so I use one or two brushes exclusively. Another way is to use a brush for your normal painting until you feel like replacing it and then use that worn brush for drybrushing. It gets you a little more use out of it.


5. Put effort into your first miniature so you can put less into the rest.


The first mini is the hardest one. You have some ideas but until you see the way it actually looks, you don't really know. So spend some time getting that first mini right because it'll be the template you use for the rest of your army. Personally, I suggest you use one of your line troops for that first mini. Once you get that basic guy with his basic scheme, you'll have a better feel for how your uniform army might look. If you have a special guy like a commander or some such, you can embellish and add cool dealies and bobbers, but he's only one mini in a large army.

6. Pick two colors you'll like and stick with them.

If you want to pick 8 colors for your basic scheme, that's great, but trust me, the more complicated you make the basic scheme, the busier and messier it looks. Sure, you may want to use other colors for detail and other things, but 2 basic colors are easy to paint and look neat. For my army, I use blue and black. Sure, I use Boltgun Metal for guns and other colors for pads for various reasons, but when my army is on the field, it's a blue and black swarm and that's what people see when they face me (see #1).

7. Assembly line painting is awesome!

If you have a first mini for a template and a basic easily paintable scheme, there's no reason why you can't get a ton of paining done! Line up 5 troops and make an assembly line. Paint all the arms then paint all the legs then the torsos, weapons, details, whatever needs to be done. With a simple scheme, you can easily do five in an hour. Sit down in front of the TV and by the time your drama is over, you'll have more guys done.

8. Don't hesitate to break a rule if you like the end result.

Sure, my Marines are blue and black, but my Terminators are orange with blue highlights. Most of my Marines are made along certain basic lines, but my Veteran and Command squads are all a mish-mash of weapons and styles. I paint all my special and heavy weapons the same ways except for bolters. Sometimes they have blue casings, sometimes they're all Boltgun metal. I like the way they look and that's what matters most. As long as you're happy with what you do, that's what matters most.

9. JUST PAINT.

Even if you only paint one mini a night, keep painting. Think about it. If you paint one mini a night, in a year you'll have 365 of them done. That's three and a half Companies! The more you get done, the more complete and filled out your army will look. The more you have done, the more you'll want to get done. It always seems daunting, but once you have one squad, you'll want to do another. Once you have a bunch of troops, you'll want to do an HQ to lead them and some heavy weapons and assault squads to support them. Soon, you'll want to give them some transports and tanks to move them all around and then you'll actually look forward to painting more. And once you have a lot of stuff painted, you'll want to play more which will make you want to paint more and so on.

Hopefully, these pointers will be helpful to you. Next week, I'm going to do something for those folk who are more visual in nature. I'm going to use all these ideas and go through a paint job from scratch so you can see how some of these ideas work for me. Until then, happy painting!

Saturday, January 12, 2008

Escalation Misery

Well, the third session of the Dragon's Lair Escalation League was held today, and I think I can say I've never had a more wretched experience playing in my life. Possibly a game I played in 2nd edition against Orks and Gretchin who all hid in a building, and whose player insisted that I couldn't see any of them, couldn't target any of them, and had to walk across an open plain so he could shoot me-- at which point I realized this game was going to suck, packed up my models and put them back in the car. That game might have been less fun than this one.

Today, every table had loopy "special terrain" rules on it, such as "acid rain does hits to everything every turn" or "rockslides hit random board edges each turn" or similar wacky shit. Ours was, oh, yes, monsters are in every bit of terrain that count as cover, roll 2d6 every time you start in cover or enter it. On a 7 or doubles, a monster eats one of your models. Boy, was that fucking fair! I mean, given that my army uses cover and none of my opponents do. Yes, opponentS plural, because I got teamed up two on two.

Never. Fucking. Again.

One of our opponents was a good player indeed, and earned his victory points. As for the other, I think Poney and I deserve half of the VP he got, because WE HAD TO PLAY HIS FRIGGING ARMY FOR HIM. And he didn't bring any templates. Or scatter dice. Or know what his special rules were. Or what equipment his Lord was carrying, or what its stats were. Or what BS4 means.

You begin to get the idea.

Oh. And he was fielding Necrons. With a Monolith in a 1000 point army.

Yeah.

I'll have to think over whether to continue this league, because frankly, I'm sick of the teamups, in which you can't win or lose on your own, and the wonky added rules. And frankly, I'd rather kill myself than play Master Monolith again.

It was a miserable, painful, tedious waste of a Saturday. At least it wasn't raining.

Friday, January 11, 2008

On The Death of Heroes

This will be a small departure that has a point. On January 10, 2008, Sir Edmund Hillary died. He was a hero of mine, so in memory of this great explorer I present my favorite quote that was attributed to him when he failed to reach the summit of Everest in 1951. He said, “You defeated me! But you won’t defeat me again! Because you have grown all you can grow… but I am still growing.”

The point: Don’t let defeat be the end. So many times we face defeat, or loss, and we give it permission to win. From defeat we assume the position that we are unable, or that we will never win. Defeat is a better counselor than victory. That is because victory is the result of successful learning, and that you have applied the lessons that have been presented to you. Defeat means that something or someone has presented a lesson that we either haven’t learned or that we are wrestling with. Defeat is also the wonderful reminder that we are human.

So tonight let us raise a drink to a man that showed us defeat will enable us to find victory!

Cross posted at Tactical Rock

Thursday, January 10, 2008

Mines of Moria scenarios, part one

The Hive Queen and I tried out the first couple of scenarios in the Mines of Moria boxed set, which is an intro game for Lord of the Rings. This has some things in common with most other Games Workshop games, and a few things that differ. So far, it seems fun.

The first difference is in the turn sequence. 40K and Fantasy players are familiar with the "I go/ You go" system, in which the first player moves, shoots, fights, and then the second player moves, shoots, and fights. For LOTR, the player with "priority" (in most scenarios, this is the Good player) moves, then the second player moves; the "priority" player shoots, then the second player shoots; the "priority" player picks a fight to resolve, and so on. Finally, there is a roll-off for priority, which goes to the high roll, or switches hands in case of a tie.

The alternating phases can bring some surprises for 40K and Fantasy players, as the player with "priority" may move to line up shots, only to have the second player move to spoil them and line up shots of his own. Shooting is done similarly to most GW styles (and again, Hive Queen had some frustration as it was familiar to her to move, then start shooting only to be told, "nice shot, but it's not your turn to shoot yet!"), while rolling to wound and making armor saves have been combined into a single roll, with Toughness and Armor becoming a single stat called Defense.
The old GW rolls of 7, 8, and 9 are back, as weak creatures may need a 6, followed by a 4+ or higher, to wound particularly tough or well-armored opponents. Also, bows are not particularly Strong, so that they rarely seem to wound, which can be frustrating: our first match ended with the Fellowship standing at point blank range from a goblin, with Aragorn and the goblin shooting at each other, each maniacally praying to both Hit and Wound. By the end of it, they must have been picking up each other's spent arrows to shoot back at each other.

In the boxed scenarios, one cannot shoot at a target unless it is a clean shot, unobstructed by any other model or terrain-- this also led to real frustration for the Hive Queen, as I'd make sure to keep those four bunched-up goblins from all being able to shoot at their choice targets. In the full game, this is less of a problem, as you can shoot past obstacles (or friendly models, if you're Evil), and just have to make a 4+ roll to pass each obstacle.

Scenario one requires the entire Fellowship to cross the board and exit through the door at the far end (conveniently, the size of the battlefield for the boxed scenarios is the size of the inside of the game's box lid, so if you've got the mins and terrain in the box, you have a travel set). Evil wins if it can kill any of the Fellowship. Since the non-hobbits all have more than one Wound each, and since only Legolas and Aragorn get to shoot in this scenario, it's sensible to shepherd the little guys along behind the cover of the big'uns. Good won in both trials, but we may go back to this one with the full rules once we know the game better.

The second scenario puts Aragorn in the middle of the board, an oblong room with pillars down the middle, needing to exit alive through the door in the middle of the far wall. Eight goblins are split between each end of the field, and win if they can kill Aragorn. This one ended quickly, when Aragorn moved out of cover and was charged first by two goblins, then by all the rest.

Fighting in LOTR is done by first moving into base to base with an opponent, who may no longer move once contacted. He can't shoot, either. Attackers on each side roll dice equal to the number of Attacks they have (in the first round, 3 for Aragorn, and 2 for the 2 goblins). Roll those dice, and the side that rolls the highest die wins. If there's a tie, compare the Fight statistic to break the tie. The loser is knocked back 1" or 2cm, and the winners score their full number of Attacks against him, rolling their Strength vs their victim's Defense. Aragorn luckily avoided being wounded in the first round, but Evil got priority in the second turn, and moved first, surrounding him completely, or Trapping him (a Very Bad Thing Indeed).

Remember that the loser gets knocked back (a rule you'll find all the way back in Rogue Trader, btw). Well if he's surrounded or can't move back, then he is Trapped and takes double the nromal number of hits. So in the second turn, there was poor little Strider, taking 12 Strength 3 hits, that needed 5+ to wound, and while the six goblins had to move back themselves (because this 1cm gap always has to be established at the end of combat), there was no way for him to move past them to get clear in his next move phase even if he did survive. Down went Strider, and we called it a night.

In the full game, Aragorn could have used his Might to adjust his dice (making him more likely to win combats and to Wound), and to call for Heroic Actions, moving out of sequence, Fighting more than one combat in a turn, using the Flame of the West to Wound more easily, etc. In the boxed set, this second scenario seems to be there to hammer home that wandering off on your own on the battlefield is suicide.

We'll let you know how the next scenarios play out in the next installment.

Thursday, January 3, 2008

Thunderbolt WIP


I was so excited about completeing the air frame of my Thunderbolt that I had to get these Pics up. The template I used was from Table Top War. These templates were more for paper, but with creativity and Evergreen Sheet Styrene I turned out the basic frame for my Thunderbolt. The materials ran about $10, which will allow me to do more than one project. (Before anyone extols the virtues of "For Sale" signs at The Home Depot; all I will say is that The Home Depot doesn't provide any helpful hints on scratch building models like the local train/ model shop.)


This is stage one. I still have gap filling, body work, and weapon systems to do. Overall I am happy with how this turned out since this is my second scratch built vehicle that I have ever done. Here are some more pics I hope you enjoy.


Crossposted at: The Tactical Rock.